IDCS Multi-Factor Authentication
"Bumpy roads lead to beautiful places"
- Senior Director @ Oracle 🧑💻
- #orclapex fan since '99 🛠️
- https://spendolini.blog 💻
- Oracle Ace Alumni ♠️
- Bleed Syracuse Orange 🍊
- Golf when I can ⛳️
- Austin, TX 🎸🍻
- Views are my own 🫢
Photo by NordWood Themes on Unsplash
Now that we have APEX delegating authentication and authorization services to IDCS, let's add another layer of security: multi-factor authentication. Multi-factor authentication - or MFA for short - provides an additional layer of security when signing in to applications. It requires the user to either answer security questions or enter a code from their email, an application or a token to prove they are who they say they are.
More and more, MFA is being mandated by government regulations, IT organizations and even cybersecurity insurance policies. So it's no longer something that's "nice to have", but a hard requirement when building applications.
While it's possible to build some sort of MFA using APEX, it's not the best option. Rolling your own security component is rarely a better approach than using those that are commercially available. With IDCS, it takes just seconds to enable MFA for APEX applications using a variety of methods. Additional sign-on rules can also be implemented - such as only requiring MFA from outside of a VPN. This level of flexibility as well as the fact that Oracle is maintaining the moving parts is more than enough reason to rely on Oracle's version of MFA.
Enabling MFA Factors
First, let's take a look at the options that are available for MFA in IDCS:
| Type | Description |
| Security Questions | Provide a list of questions & answers for users to answer |
| Mobile App Passcode | Reveice and enter a passcode from the Oracle Mobile Authenticator app |
| Mobile App Notification | Receive and acknowledge a notification on the Oracle Mobile Authenticator app |
| Text Message / SMS | Receive a code via SMS |
| Phone Call | Receive a code via a phone call |
| Receive a code via an email | |
| Bypass Code | User or admin-generated codes |
| Duo Security | Use Duo Security's commercial MFA solition |
| FIDO Authenticator | Use FIDO-based MFA, such as biometric, passkey, etc. |
You can enable any combination of the above factors, allowing your security posture to be flexible and meet any needs that you may have.
Let's enable some of them now.
Switch to the IDCS Console. If you forgot how to get here, refer to the previous post in this series.
Click the "hamburger" menu, expand Security and select MFA. You should see the following screen:
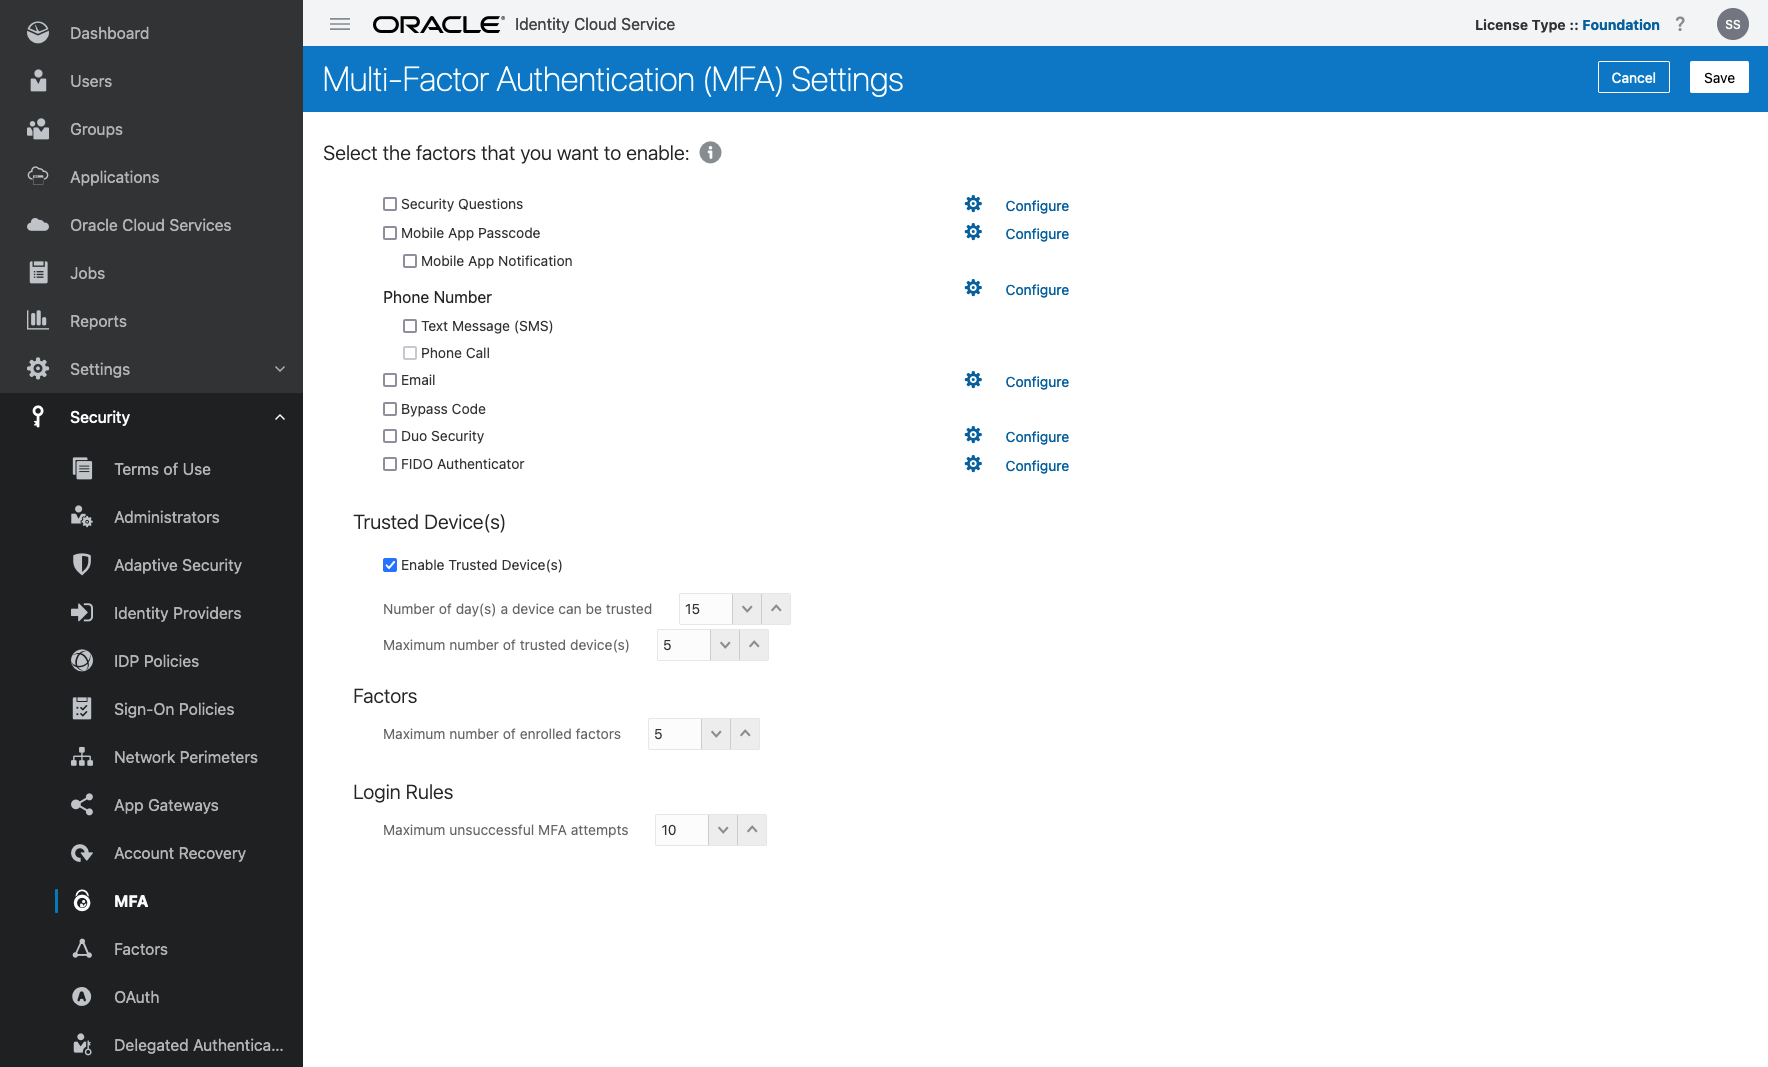
- Select Security Questions, Mobile App Passcode, Mobile App Notification, Email and FIDO Authenticator and click Save.
Notice that most of the options have a "Configure" link next to them. This can be used to further configure each option. There are quite a few options available for each option. Be sure to take some time to become familiar with all that is available.
Creating a Sign-On Policy
Now that we have configured & activated our factors, we will need to associate them with our APEX application. This is done by creating a Sign-on policy. A Sign-on policy has a set of rules that when met, require additional steps when a user signs-on to our applications.
We'll start by adding a new policy that requires any of the MFA factors that we enabled.
Click the "hamburger" menu, expand Security and select Sign-On Policies.
Click Add.
Enter
APEX Sign-On Policyfor the Policy Name and click >.Click Add Rules.
Enter
MFA for Usersfor the Rule Name.In the Actions section, check Prompt for an additional factor.
Select Any Factor.
Set Frequency to Every Time.
Click Save.
Click >.
Click Assign Apps.
Select IDCS Demo and click OK.
Click Finish.
It's not obvious, but we need to activate this policy before it will take effect.
Click the "hamburger" menu, expand Security and select Sign-On Policies.
Click the checkbox next to APEX Sign-On Policy and then click Activate.
Click OK.
Now, sign out and sign in to your APEX application. You should see a screen similar to this one:

When you click Enable Secure Verification, you will be prompted to select one of the MFA factors that we configured in the previous section.
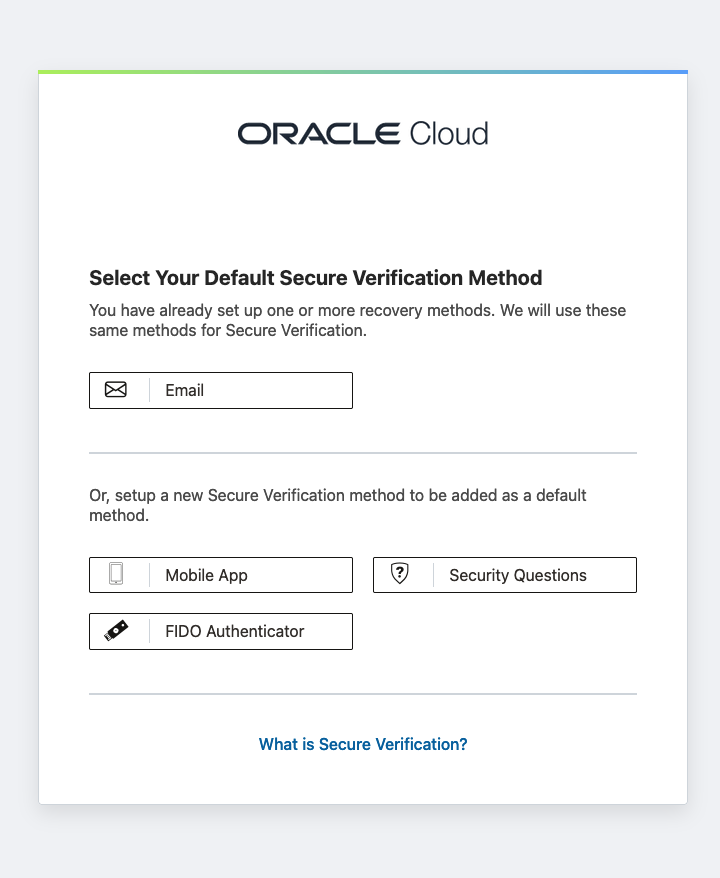
Select one of the factors and configure it to continue. Keep in mind that from now on, you will need to provide an extra credential to access your APEX application due to this Sign-On Policy.
Should you want to change factors, you can switch over to the IDCS Console, locate the user, and select Reset Factors from the smaller "hamburger" menu on the upper right side of the screen.
Customizing a Sign-On Policy by Role
Currently, our Sign-On Policy will require all users to always enter an additional factor. That's because we only have a single rule that dictates as such. Sign-on policies can be much more complex, involving multiple rules that apply different factors based on your location, group membership or other attributes.
Let's add another rule that allows users in the Admin group to skip MFA.
Click the "hamburger" menu, expand Security and select Sign-On Policies.
Edit the APEX Sign-On Policy.
Click the Sign-On Rules tab.
Click Add
Enter
No MFA for Admin Usersas the Rule Name.Select
adminfor And is a member of these groups.Click Save.
Since the MFA For Users rule has no conditions, it will always execute. Thus, we need to make it the last rule inspected, as only one rule - the one whose conditions are met - will be applied to a Sign-On Policy.
Hover over the three stripes to the left of the Rule Name and drag the MFA for Users rule so that it is second.
Click Save.
The results should look like this:
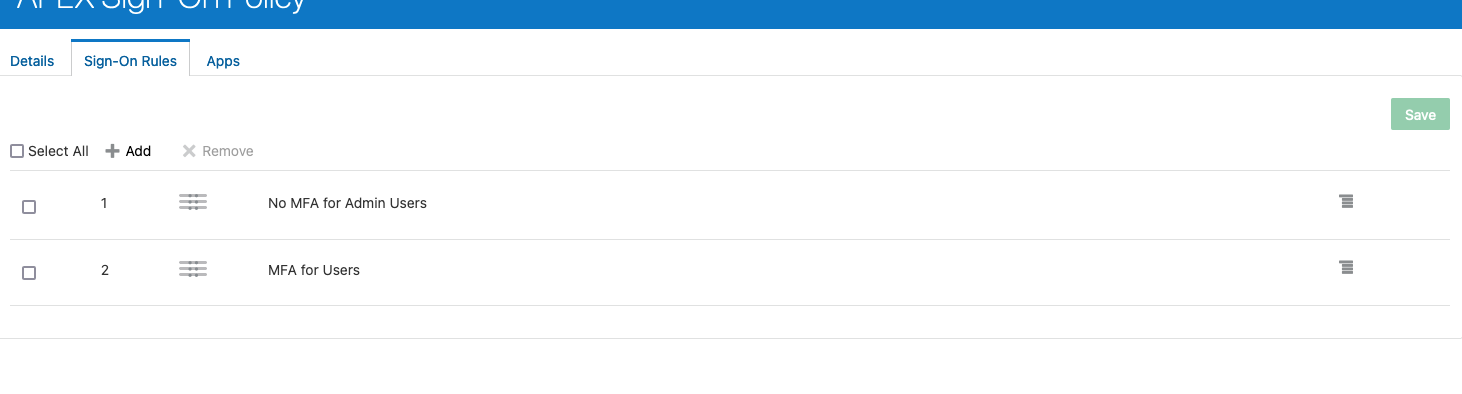
Now, make sure that your user is part of the Admin group, sign out and sign in again. You should not be prompted with an additional factor. Remove your user from Admn, sign out and sign in again and this time you will be presented with the MFA screen.
Customizing a Sign-On Policy by Network
Another way to enhance a Sign-On Policy is by Network Perimeter. A Network Perimeter is a set of IP Addresses that if a user is part of, they can be either allowed or denied access to an application. For example, if the user is coming from an IP address that is part of a corporate VPN, we may not need to ask for MFA since the user has already successfully provided credentials to the VPN.
Let's walk through how this would work with a fictitious IP address for our VPN. We'll simply modify the rule that we already have created, but a new rule could also be created and added to the policy.
Click the "hamburger" menu, expand Security and select Network Perimeters.
Click Add.
Enter
VPNfor the Network Perimeter Name and add your VPN's IP address(es) to the List of IP Addresses, using a comma between each one.Click Save.
Click the "hamburger" menu, expand Security and select Sign-On Policies.
Edit the APEX Sign-On Policy.
Click the Sign-On Rules tab.
Edit the No MFA for Admin Users rule.
Change the Rule Name to
No MFA for VPN Users.Remove the Admin group from the list of groups.
Set And the user's client IP address is to is one or more of these network perimeters.
Select VPN from the list of network perimeters.
Click Save.
At this point, if you log in to your corporate VPN and try to access the application, you should not be prompted for an additional factor. If you disconnect from the VPN, then you will once again need to provide a second factor when logging in.
Conclusion
Multi-factor authentication is fast becoming a de-facto standard when it comes to authenticating users. The days of not using it are numbered, and many organizations have already made the jump. APEX does not have to sit this one out - it's trivial to use IDCS's robust set of MFA tools to easily integrate with APEX, all without changing a single thing in APEX or writing a single line of code.
Next up: IDCS Other Features