Blog with a View

"Bumpy roads lead to beautiful places"
- Senior Director @ Oracle 🧑💻
- #orclapex fan since '99 🛠️
- https://spendolini.blog 💻
- Oracle Ace Alumni ♠️
- Bleed Syracuse Orange 🍊
- Golf when I can ⛳️
- Austin, TX 🎸🍻
- Views are my own 🫢
Photo by Clémence Bergougnoux on Unsplash
Literally, that's it.
With a single view, I was able to take this very blog and build an APEX version of it, all in about an hour.
Don't believe me?
Check out apex.spendolini.blog
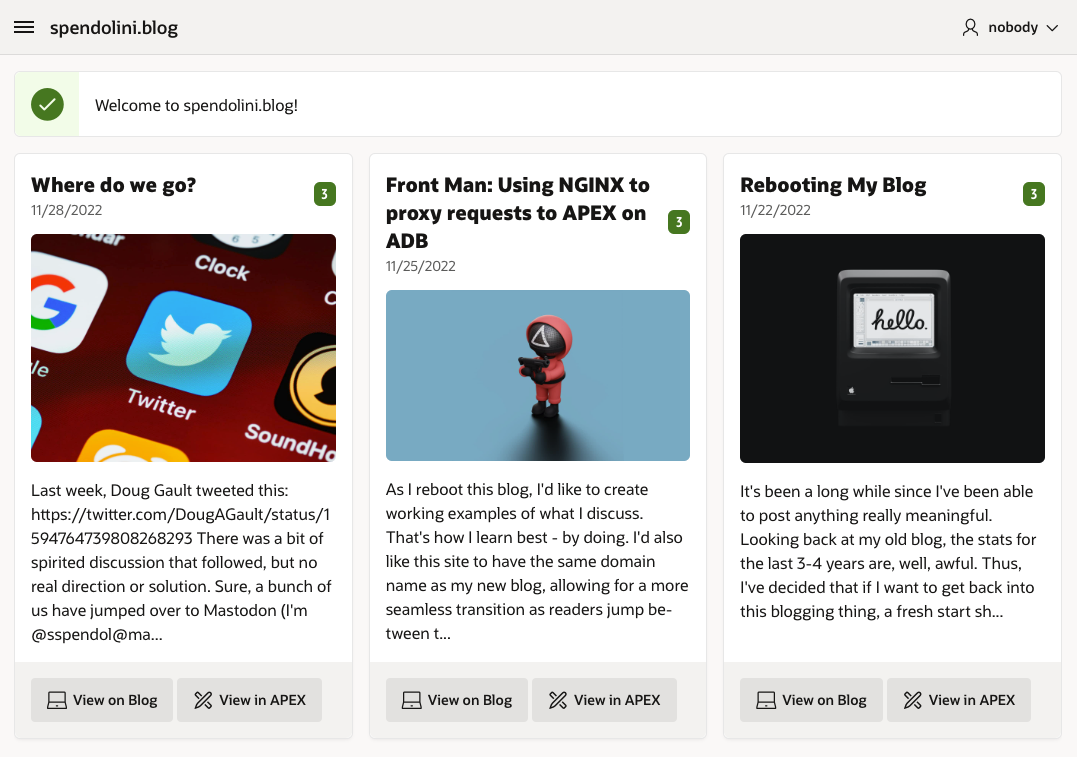
This is an APEX application that has a single view that queries the Hashnode API in realtime. So if you add a reaction to a post, the badge number will be updated the next time you view it on APEX.
The View
Want to try it in your own Workspace? Here's the SQL for the view:
create or replace view blog_v
as
with json as
  (
  select
    apex_web_service.make_rest_request
      (
       p_url=> 'https://api.hashnode.com'
      ,p_http_method => 'POST'
      ,p_body =>
           '{ "query" : "query '
        || '  { user(username: \"sspendol\") '
        || '    { publication '
        || '      { posts(page: 0) '
        || '        { slug title brief coverImage _id dateAdded totalReactions contentMarkdown }'
        || '      }'
        || '    }'
        || '  }"'
        || '}'
      ) as val
  from
    dual
  )
select
   t.id
  ,to_timestamp(t.date_added, 'YYYY-MM-DD"T"HH24:MI:SS.FF"Z"') as date_added
  ,t.slug
  ,'https://spendolini.blog/' || t.slug as url
  ,t.title
  ,t.brief
  ,t.cover_image
  ,t.popularity
  ,t.total_reactions
  ,t.content
from
  json,
  json_table
    (
      json.val
     ,'$.data.user.publication.posts[*]'
    columns
      (
       id              varchar2(1000) path '$._id'
      ,slug            varchar2(1000) path '$.slug'
      ,title           varchar2(1000) path '$.title'
      ,brief           varchar2(1000) path '$.brief'
      ,cover_image     varchar2(1000) path '$.coverImage'
      ,date_added      varchar2(1000) path '$.dateAdded'
      ,total_reactions number         path '$.totalReactions'
      ,content         clob           path '$.contentMarkdown'
      )
    ) as t
/
Once created, I just added a standard Card report to the page, and mapped the corresponding columns in the Attributes.
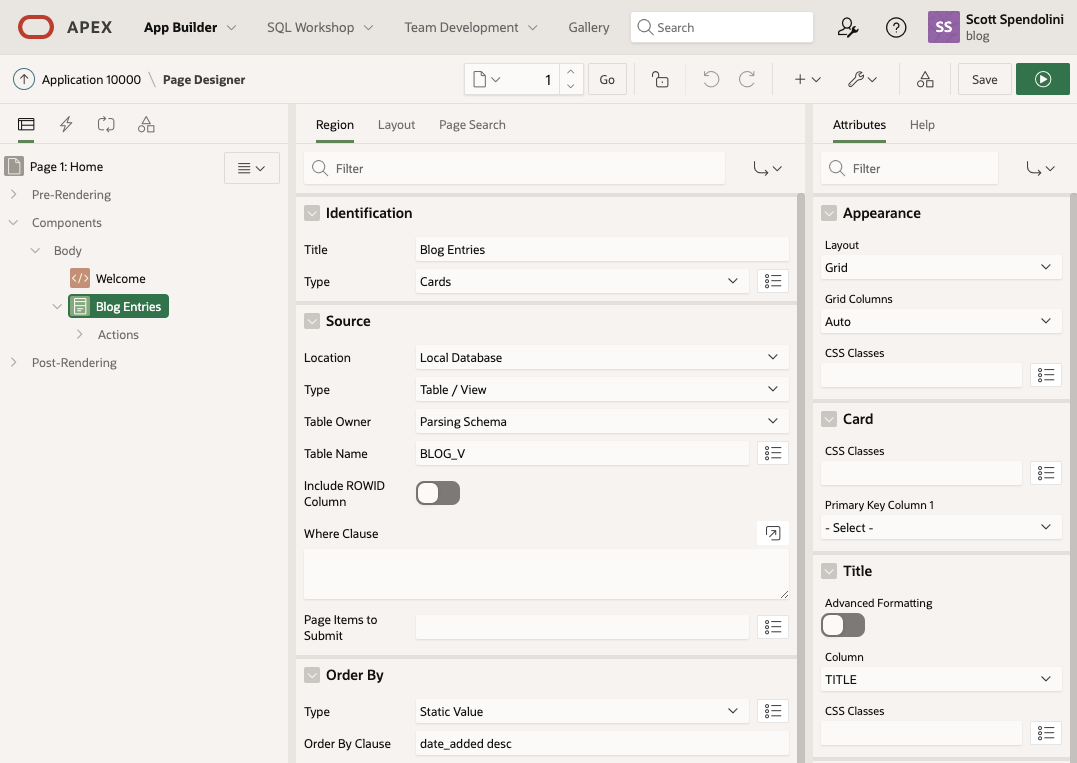
That's it!
Let's walk through the parts of the view and explain what's going on.
WITH Clause
with json as
  (
  select
    apex_web_service.make_rest_request
      (
       p_url=> 'https://api.hashnode.com'
      ,p_http_method => 'POST'
      ,p_body =>
           '{ "query" : "query '
        || '  { user(username: \"sspendol\") '
        || '    { publication '
        || '      { posts(page: 0) '
        || '        { slug title brief coverImage _id dateAdded totalReactions contentMarkdown }'
        || '      }'
        || '    }'
        || '  }"'
        || '}'
      ) as val
This query will call the apex_web_service.make_rest_request API. When pointed at the Hashnode API, we can use GraphQL to write a simple query and pass that over as a JSON document.
You can change { user(username: \"sspendol\") to any Hashnode user and get their content instead of mine. Since all of these APIs are public and read-only, there's no restrictions at all.
API Columns
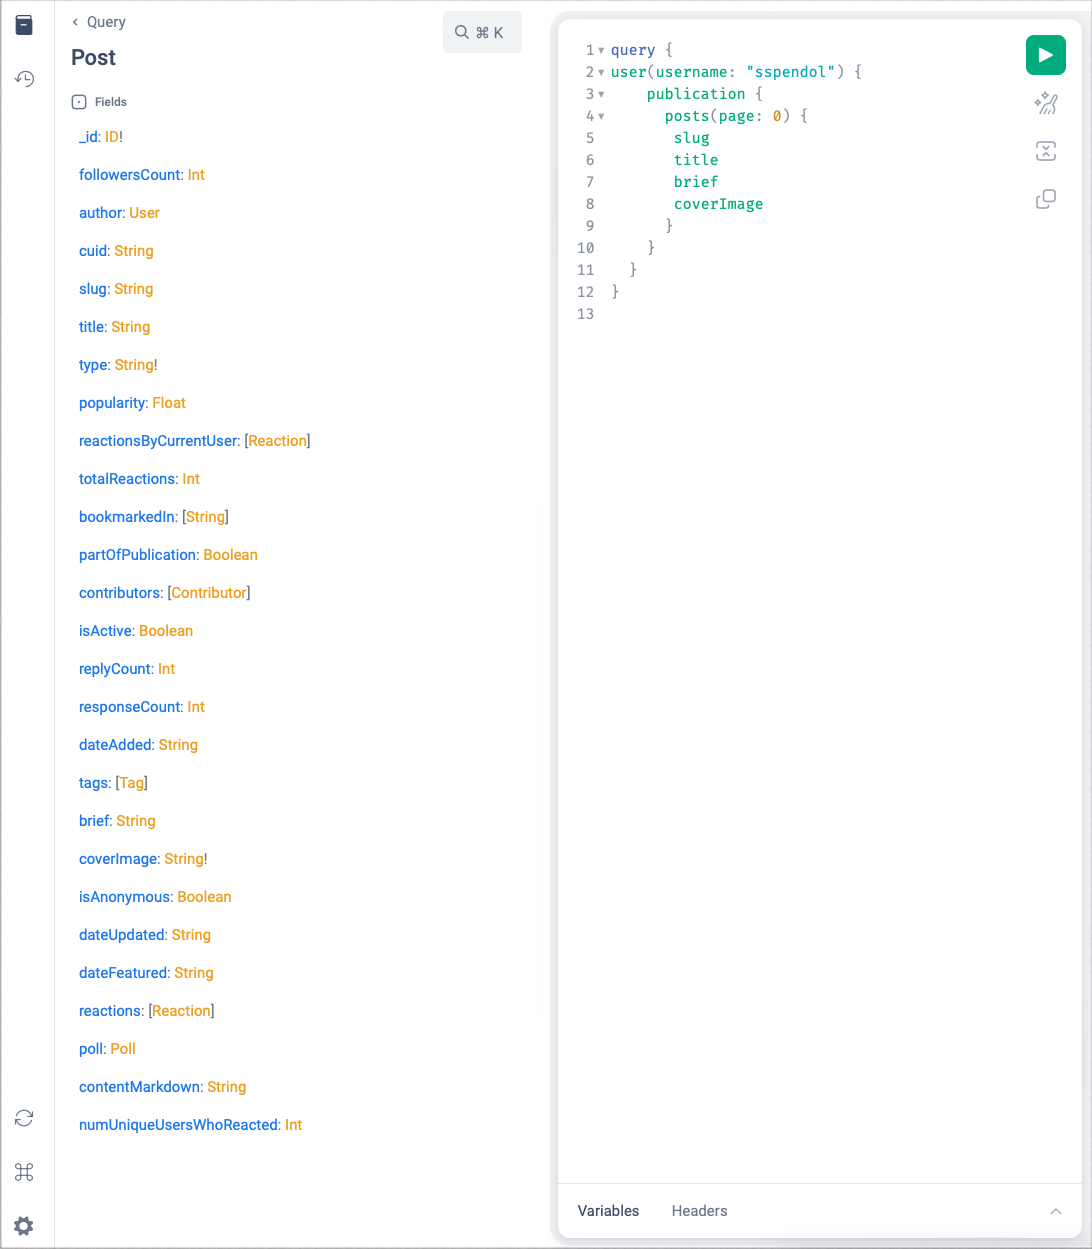
This line: { slug title brief coverImage _id dateAdded totalReactions contentMarkdown }' is a list of the columns we want to include in our query. You can see the full list of columns that are available with Hashnode's API tool.
Here's a screen shot of the available columns:
When run, we get the following JSON document:
{
  "data": {
    "user": {
      "publication": {
        "posts": [
          {
            "slug": "where-do-we-go",
            "title": "Where do we go?",
            "_id": "6384d04a749809fe25f7faec",
            "dateAdded": "2022-11-28T15:14:18.123Z",
            "totalReactions": 3
          },
          {
            "slug": "front-man-using-nginx-to-proxy-requests-to-apex-on-adb",
            "title": "Front Man: Using NGINX to proxy requests to APEX on ADB",
            "_id": "6381218e3a25a497cb82db51",
            "dateAdded": "2022-11-25T20:11:58.137Z",
            "totalReactions": 3
          },
          {
            "slug": "rebooting-my-blog",
            "title": "Rebooting My Blog",
            "_id": "637c45b96b0159d8d7f1363a",
            "dateAdded": "2022-11-22T03:44:57.055Z",
            "totalReactions": 3
          }
        ]
      }
    }
  }
}
I removed the brief & contentMarkdown columns so that the file didn't take up so much space. The idea is the same - this is a simple JSON document that we can easily transform to relational rows with Oracle.
JSON_TABLE
Now that we have our JSON document portion of the query buttoned up in a WITH clause, we can use JSON_TABLE to extract the columns from it.
This part of the query:
select
   t.id
  ,to_timestamp(t.date_added, 'YYYY-MM-DD"T"HH24:MI:SS.FF"Z"') as date_added
  ,t.slug
  ,'https://spendolini.blog/' || t.slug as url
  ,t.title
  ,t.brief
  ,t.cover_image
  ,t.popularity
  ,t.total_reactions
  ,t.content
from
  json,
  json_table
    (
      json.val
     ,'$.data.user.publication.posts[*]'
    columns
      (
       id              varchar2(1000) path '$._id'
      ,slug            varchar2(1000) path '$.slug'
      ,title           varchar2(1000) path '$.title'
      ,brief           varchar2(1000) path '$.brief'
      ,cover_image     varchar2(1000) path '$.coverImage'
      ,date_added      varchar2(1000) path '$.dateAdded'
      ,total_reactions number         path '$.totalReactions'
      ,content         clob           path '$.contentMarkdown'
      )
    ) as t
Looks like more traditional SQL with one exception - the JSON_TABLE clause in the FROM portion. JSON_TABLE will transform a JSON document into rows and return the designated columns, as per the COLUMNS directive.
Using this directive - $.data.user.publication.posts[*] - we can loop through the posts array and then transform the JSON data to Oracle datatypes. Once we have the Oracle datatypes, we can do typical things with those columns, such as concatenate text, convert to a timestamp, etc.
Summary
The Hashnode API and associated tools are quite impressive. They were easy to use, intuitive and very fast. Most of my time creating the view was tinkering with the GraphQL syntax, as this is my first exposure to that. Once I was able to call it from Postman, it took almost no time to get it up and running in APEX.
If you created a free workspace on apex.oracle.com or have an account on the Oracle Free Cloud, you can literally copy & paste the view and be up in running in just a couple minutes.
I think that being able to pull content from a blog and merge that with actual APEX components is going to be a powerful way to illustrated APEX-related concepts for future blog posts.